To register
for Employee Self Service, please follow the instructions below:
- Click
‘Register’ button on the Employee Login Page, which will display the
Registration Details Screen
 Fill in the fields: (If Active Directory is being used, fill in empty fields with your
Network Login Details.)
Fill in the fields: (If Active Directory is being used, fill in empty fields with your
Network Login Details.)
- Work Email Address
- Confirm Work Email Address
- User Name (must be unique)
- Password (case sensitive) – Password
Strength Indicator
- Confirm
Password (case
sensitive)
- Answer the
five Security Questions (NOT case sensitive)
- *N.I. Number OR Employee Number and Date of birth
*This will be used to verify an Employee
against the PAMS Employee record
- Click ‘Register’ button (or
click ‘Back To Login’ button if you change your mind)
- A prompt will appear indicating
that your details will be sent to HR for verification; click OK
- You will receive an email with
your details informing you that approval is needed from HR
- Once HR approves your
registration details, you will receive another email confirming your
registration; proceed to Logging In
Please keep
this account login information in a safe place.
NOTE: An HR Administrator can also
create an account for you. If they do,
you will receive an email (including user name and password) informing you to
complete your registration by clicking the Please follow this link to Complete Registration
link then follow Steps 2-6 above (filling in empty fields).
Once you
have registered for Employee Self Service, you can proceed to login either from
your email or from the Web Page. Here’s
how:
Email:
·
Open your approval registration email from HR;
·
Clicking on the ESS Login Page link will take you to the Employee
Self Service Login Page
·
Afterwards, follow the Web Page steps shown below to
access this System
Web Page:
1. Open the relevant
web page
2. The Employee Login Page
appears
3. Now enter your User
Name, Password and answer the security question (changes at each login), if you
wish tick the checkbox “Remember my user name” (if you want the system to
remember your username each time you log in) then click the ‘Login’ button
which displays your Home Page.
The Home Page is the control centre of what you can do
in this System. You can click  on the toolbar at anytime,
which will take you to the Home Page
on the toolbar at anytime,
which will take you to the Home Page
The password is case
sensitive.
NOTE: If Active Directory
credentials are being used, you cannot reset your password, please contact your
IT Department
To reset
your password, please do the following:
- On the Login Page of Employee
Self Service under ‘Forgotten
Password?’, enter your User Name
- Click ‘Reset Password’ button
- Fill in the fields:
- Date of Birth
- Enter your answers to the five Security Questions (created during registration – NOT case sensitive)
- New Password
- Confirm Password
- Click
‘Reset Password’ button (or click ‘Back To Login’ button if you change
your mind)
- Prompts
‘Your password has been reset’ click Ok returns to the Employee Self
Service Login Page
- Now
proceed to Logging In with your new password, you will receive an email
with your new details
Please keep
this new password in a safe place.
From the
toolbar click  - This screen provides your login information
which you can edit and save.
- This screen provides your login information
which you can edit and save.
This is
confidential information only to you.
Only view when necessary.
In this Section, you can
request various types of leave or view your requests and their status, delete
requests and more.

Click on Add New Leave
Request link, the Leave Request Wizard appears; go through the Wizard carefully:
- Type in the Start Date (or click on
 and select
the date)
and select
the date)
- The End Date populates the same date as the Start
Date, amend if necessary
- Click to select either Full day, First or Second
half of the Day for both Start/End Dates
- Select a Leave Reason
NOTE: The Annual
Leave reason is the only entry that deducts from the Employee’s Annual Leave
Balance.
- Summary Details of your Contract will be
displayed – If you have more than one job, select
the relevant Contract from the drop-down list for this Leave Request
- In the notes box, type in any information that
you would like your Line Manager to be aware of
- Click ‘Next’ button
Throughout
the Wizard, the ‘Cancel’ button returns
you to the Employee’s Home Page.
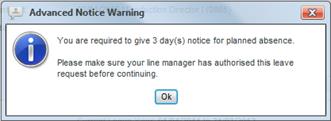 IMPORTANT: If
prompts ‘You are required to give a number of
day(s) notice for planned absence.
Please make sure your line manager has authorised
this leave request before continuing.’ This means the Advance Notice parameters
are set to a specific number of days, contact your Line Manager to confirm
before proceeding to Step 2 – Days/Hours.
IMPORTANT: If
prompts ‘You are required to give a number of
day(s) notice for planned absence.
Please make sure your line manager has authorised
this leave request before continuing.’ This means the Advance Notice parameters
are set to a specific number of days, contact your Line Manager to confirm
before proceeding to Step 2 – Days/Hours.
- A summary of your Leave Request will be displayed
 If the days/hours are not displayed, a message will appear - click OK then enter your days; the hours
will be calculated
If the days/hours are not displayed, a message will appear - click OK then enter your days; the hours
will be calculated- If it is incorrect, click ‘Previous’ button and
change the details
- If it is correct, click ‘Next’ button
NOTE: Step 3 will only update if you selected in Step 1 the Leave Reason as Annual Leave.
- A breakdown of your
Annual Leave balance will be displayed
|
|
Days
|
Hours
|
|
|
Brought Forward
|
0.00
|
0.00
|
Leave
from the previous year (see Contract)
|
|
Leave Allocation
|
0.00
|
0.00
|
Annual
Leave given (see Contract)
|
|
Statutory Lieu
|
0.00
|
0.00
|
Statutory
Leave given if applicable (see Contract)
|
|
Leave Taken
|
0.00
|
0.00
|
Leave taken during the
year (see Absence Records)
|
|
Future Leave Requested
|
0.00
|
0.00
|
Any
pending, elevated or future Leave Requests
|
|
Balance Before
|
0.00
|
0.00
|
Balance to the above
|
|
Current Leave
Requested
|
0.00
|
0.00
|
The current Leave
Request you are entering in
|
|
Balance After
|
0.00
|
0.00
|
The employee’s
remaining leave
|
- If you want to change
your Leave Request, click ‘Previous’ button (e.g. a negative balance)
- If you do not, click ‘Next’ button
NOTE: You must be IN THE CURRENT LEAVE YEAR for it
to show Current Leave Requested. You can
view the Current Leave Year when creating a NEW Leave Request.
- A summary of your Leave Request will be displayed
- If you want to change your Leave Request, click
‘Previous’ button
- If it is correct, click ‘Save’ button
- States that your Leave Request has been accepted
and your Line Manager will be notified
- ‘Click Return’ will return you to your Home page
- You and your Line Manager will receive an email
detailing your request
- This Leave Request
can be viewed under status Pending, see Viewing Leave Requests
On your Home page within
the Leave Requests Section, you can view your Requests by selecting the Request
Status Filter (see statuses below) then click on the View link to see the request
details.
Leave Requests statuses
are:
|
Pending -
|
Awaiting Line Manager to approve/decline
|
|
Elevated -
|
Line Manager’s approval outstanding – HR Administrator informed
|
|
Authorised -
|
Line Manager has approved your request
|
|
Confirmed -
|
Leave Request Dates has been confirmed
|
|
Declined -
|
Line Manager has not approved your request
|
|
Deleted -
|
Employee has deleted the Leave Request
|
|
Deletion Requested -
|
Line Manager has Authorised but then
Employee requests Deletion; Line Manager to approve Deletion
|
You can only delete a Leave Request with a Pending and/or Elevated
status.
- Under Current Leave Requests, click on the View
link beside a Leave Request with a
Pending or Elevated
status
- Enter a comment to your Line Manager if you wish
- Click Delete (or Click OK will
return you to your Home Page)
- Prompts ‘Are you sure you would
like to delete this request?’
- Click Yes (or clicking No will
return you to Leave Request Details Screen)
- Prompts ‘The leave
request has been deleted.’, click OK to return to your Home Page
- Your Line Manager will
receive an email detailing your deletion
- This Deletion record can now be
viewed under status Deleted. (see Viewing Leave Requests)
If a Line
Manager has already authorised your request, you will need to request a
deletion.
To Request
Deletion,
- Under Current Leave Requests, select Request
Status Filter to ‘Authorised’
- Click on the View
link
- Enter a comment to your Line Manager if you wish
- Click Request Deletion or Click
OK to return you to your Home Page
- Prompts ‘Are you sure you would
like to request deletion of this record?’
- Click Yes (or click No to
return you to Leave Request Details Screen)
- Prompts ‘Deletion has
been requested.’, click OK to return you to your Home Page
- Your
Line Manager will receive an email detailing your request
- This record can now be viewed
under status Deletion Requested, see Viewing
Leave Requests
- Once
your Line Manager has deleted your Leave Request, you will receive an
email detailing your request
‘My Tasks’ is a facility
that enables an employee to keep track of various tasks that may be assigned to
them. They are shown on the homepage under the ‘My Tasks’ section. They have
three available statuses:

·
Overdue
·
Incomplete
·
Complete
·
Click Task Inbox
·
Click New Task
·
Enter Summary, Date
Due and Description
·
Choose Assign To
·
Select the Recipient
·
Notify by Email (tick
if you require this)
·
Save
·
Click Task Inbox
·
Right click on the
task to:
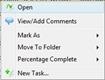 Open (if an eForm is attached,
click Complete This Form Online)
Open (if an eForm is attached,
click Complete This Form Online)
View/Add comments
Mark As - Complete, Incomplete, Overdue
Move to Folder - Inbox, Sent Items, Archive, Deleted Items
Percentage Complete – 0%, 25%, 50%, 75%, 100%
New Task – Create a new task
Incomplete/Overdue Tasks
are highlighted on the Tasks Calendar and all tasks are displayed in the Task
Inbox which has a similar layout to your email i.e. Inbox, Sent Items, Archive,
Deleted Items.
·
Clicking on the date
highlighted in blue on your Task
Calendar will show the required tasks to complete on that day
·
Click the expand arrow
to the left of the task to display details about the task, such as Current
Status, Percentage Complete and Description
·
Click Task Inbox to
open your inbox which will display the incomplete task
·
Right Click the
appropriate Task to open a drop down menu
·
You can either: Click Open to view details
Click View/Add Comments to view comments that
may have been added
Click Mark As, to change the status of the
task
Click Move to Folder, to move it to a
different folder, such as Archive
Click Percentage Complete to set the % work
that you have completed
Click New Task to set up a New Task
 If you have more than 10 tasks in your Task Inbox, you
must click the arrow pointing right along the bottom toolbar to change page to
view more Tasks.
If you have more than 10 tasks in your Task Inbox, you
must click the arrow pointing right along the bottom toolbar to change page to
view more Tasks.
Clicking the double arrow
will bring you to the last page in your Task Inbox
Once a task has been
completed, it will automatically be removed from your Task Calendar
Right click
on a task you wish to delete and go to ‘move to folder – deleted items’. Click on the Deleted Items  and right click on the task that you have just
moved and click on ‘Delete Permanently’.
This will prompt “Are you sure you want to delete?” – Click Yes to delete or Click No to return to screen.
and right click on the task that you have just
moved and click on ‘Delete Permanently’.
This will prompt “Are you sure you want to delete?” – Click Yes to delete or Click No to return to screen.
eForms
If Access Rights has been permitted, eForms will be visible under the Company section on the
Home Page.
This shows a complete list of all forms completed to
date and those still pending.
Pending eForms – click on Edit to view/complete
Complete eForms – click on Download
PDF to view/Print
Filters based on Date
Started and/or Current Status can be applied to display only a subset of eForms based on these parameters.
One of the many eForms
within ESS is the End of Probation form.
When an employee has
reached their End of Probation period, a new task will automatically be sent to
the Employee’s inbox with an End of Probation eForm
attached; this is to be completed by the employee and manager (depending on the
workflow).
For companies who
have two probation dates, there is an option for End of Probation two trigger,
where you can set how many months to send the eForm
after the first Probation Date.
There is also the option to Return
for Revision if a section has not been completed to the standard expected,
this function allows the form to be passed back, along with a reason why, so it
can be edited and resubmitted.
This Section is your personal
information that you can update (depending on your
access rights, this will determine if you can view, create and/or edit Personal
Information links)
Whenever you are clicking through these links,
the ‘Cancel’ button will return you to the Employee’s Home Page.
- Click
on one of the Personal
Information links above, for example, Emergency Contacts
- If
a prompt appears for example, ‘No emergency contact details are on record,
click OK
- Fill
in the fields
- Click
on ‘Save’ and this will return you to your Home page
- A Prompt may appear indicating
that your details will be sent to HR for verification, click OK
- Your
(for example) Emergency Contact Record is now created; click on Emergency
Contacts to see your details
NOTE: If you receive the prompt at Step 5, you will not see
your changes until HR has authorised them.
- Click
on one of the Personal
Information links above
- Amend
any of the fields or fill in missing information
- Click
‘Save’ button returns you to your Home page
- A Prompt may appear indicating
that your details will be sent to HR for verification, click OK
NOTE: If you receive the prompt at Step 4,
you will not see your changes until HR has authorised them.
This screen displays a breakdown of your annual
leave balance (read only). You can click the ‘Back’ button anytime which will return you
to your Home Page.
|
|
Days
|
Hours
|
|
|
Brought
Forward
|
0.0
|
0.00
|
Leave
from the previous year
|
|
Leave
Allocation
|
0.0
|
0.00
|
Annual
Leave given per your contract(s)
|
|
Statutory
Lieu
|
0.0
|
0.00
|
Statutory
Leave given if applicable
|
|
|
|
|
|
|
Leave
Taken
|
0
|
0
|
Leave
taken during the year (see Absence Records)
|
|
Future
Leave Requested
|
0
|
0
|
Outstanding
Leave Requests
|
|
|
|
|
|
|
Balance
|
0.0
|
0.00
|
The
employee’s remaining leave
|
NOTE: You must be IN THE CURRENT LEAVE YEAR for it
to show Future Leave Requested. You can
view the Current Leave Year when creating a NEW Leave Request.
The Contract tab displays
your current job details. The Career
History tab displays any changes made to your employment contract over the
years. These two tabs are read
only.
You can click the ‘Back’ button which will return you to your
Home Page.
This Screen
allows you to view all the absences you have taken during the years. You can click the ‘View Records’ button to
display Absence Records using the default filter criteria OR Enter and/or select your search criteria then you must click
‘View Records’ button which a list of absences reflecting your criteria will be
displayed. You can click the ‘Back’ button which will return you to your
Home Page.
NOTE: Absence
Records List shows only
authorised/confirmed absence records.
Find An Employee Section
This Screen
allows you to search the System for other Employees for example, telephone
numbers.
After
entering and/or selecting the search criteria, you must click the ‘Search’
button then a list of employees reflecting your criteria will be
displayed. You can click the ‘Back’ button which will return you to your
Home Page.
NOTE: You can click ‘Search’ on the toolbar which
will take you to this screen as well.
If you are a Manager and
are registered on MSS, you are able to access MSS account simultaneously from
ESS and vice versa by clicking on ‘My MSS” icon on the top right hand side of
your Home Page.
Shown here:

Once you
are finished using Employee Self Service, please remember to Logout. Click the  icon on the toolbar. This will return you to your Login Page.
Your
session in the Employee Self Service System will expire after 30 minutes if
left untouched on the computer screen which will return you to your Login Page
and require you to enter your login details.
Should you have any questions, please contact your Human Resources
Department.